
When I saw this exhibit coming to town I had no idea how great it would actually be. I immediately wanted to go just because I love gowns, dresses, fancy frocks and girly finery. But when I got to the Minnesota History Center and went into the exhibit I had no idea I would learn about a pioneering business in America on the forefront of the Civil Rights Movement. The exhibit was centered around the Ebony magazine fashion fair that used to travel around the southern United States showcasing for the first time in our history models of color. In high fashion most notably. A world that had worked to keep people of color out of it's business. The founding family of Ebony worked tirelessly to change the images of the African American community in America. It was an uphill battle all the way. BUT-if you make the time to read the history of the magazine you will learn a great many awe-inspiring things about Johnson Publishing and the founders. I will leave you with gorgeous gowns- YSL, McQueen, Valentino, Givenchy, Dior.


And More Pretty Things.
Putting more new pieces in my shop, GirlyGeekChic today!


New Things in my Shop!
I have been so busy working on my book and getting ready for the party that I had not put much work into my ETSY shop. But I am changing that as I write this because I have been making many things. I would love it if you stopped by GirlyGeekChic.


Making Things
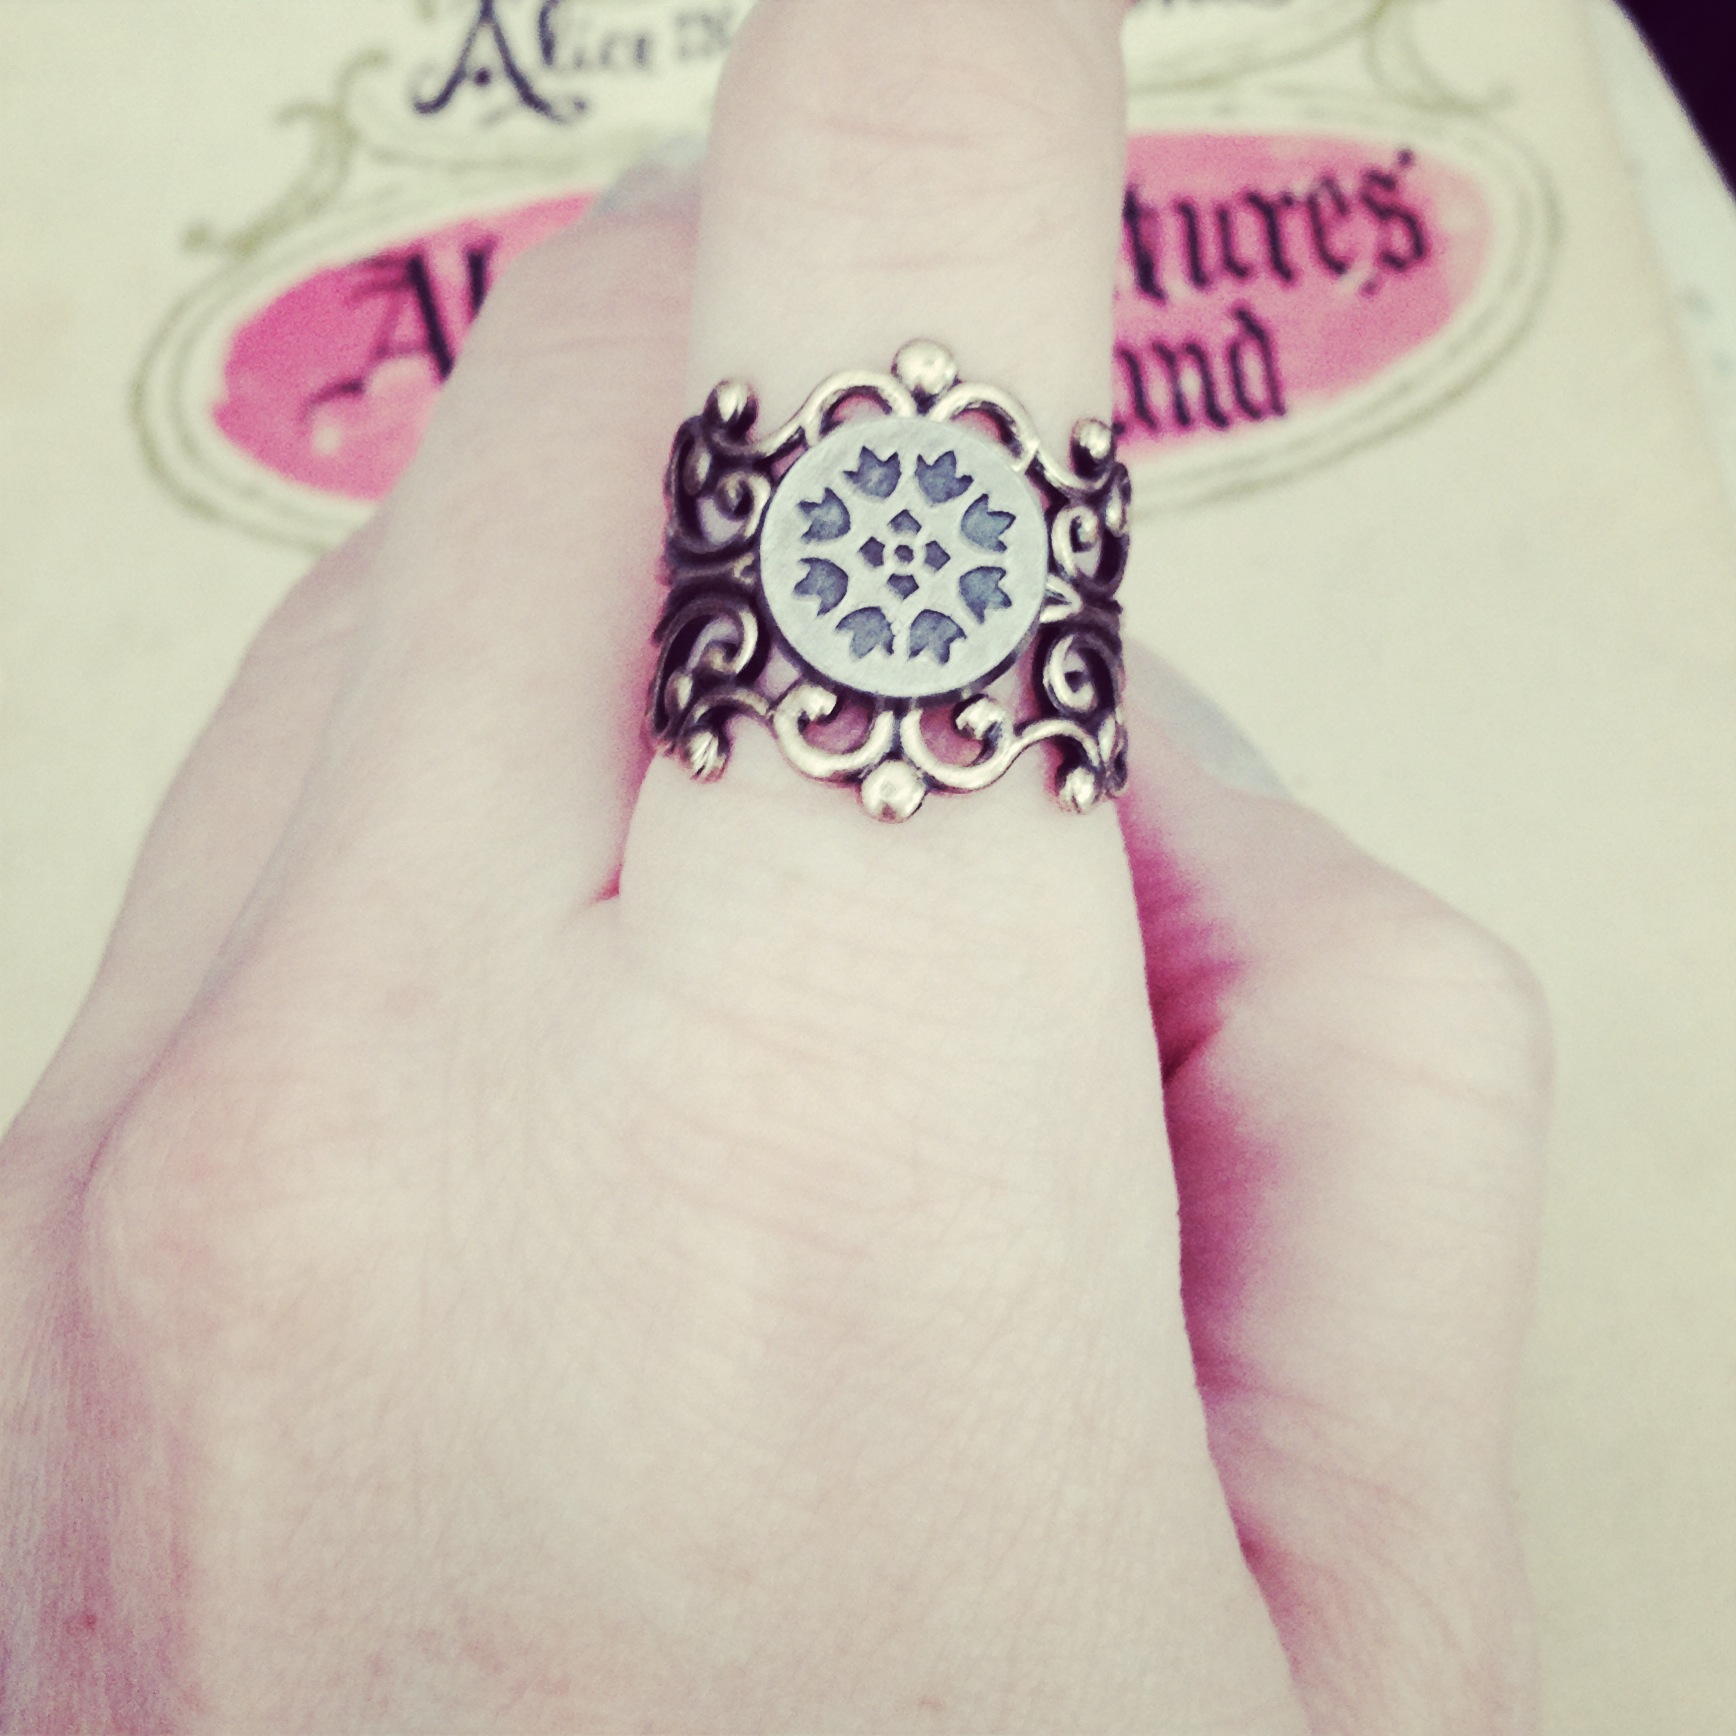
There are some sad and frustrating things happening in my life right now. When my mom died some years ago, it was suggested to me to find some sort of not serious creative outlet. I started making little handmade pieces of jewelry to distract myself. I never thought I'd still be making it and sending it all over the world. I am glad for my creative time. It's really getting me through tough times again. Sometimes it's hard to focus but when I can get right into it, the concentration required is a great help to me. These are some of my favorite things I've made and a few new things I've made recently. Some are listed in my ETSY shop, GirlyGeekChic if you are so inclined. Thank you for stopping by!


New Shop Listings!
Taking a break today to work on new listings for my shop, GirlyGeekChic. Please have a visit!


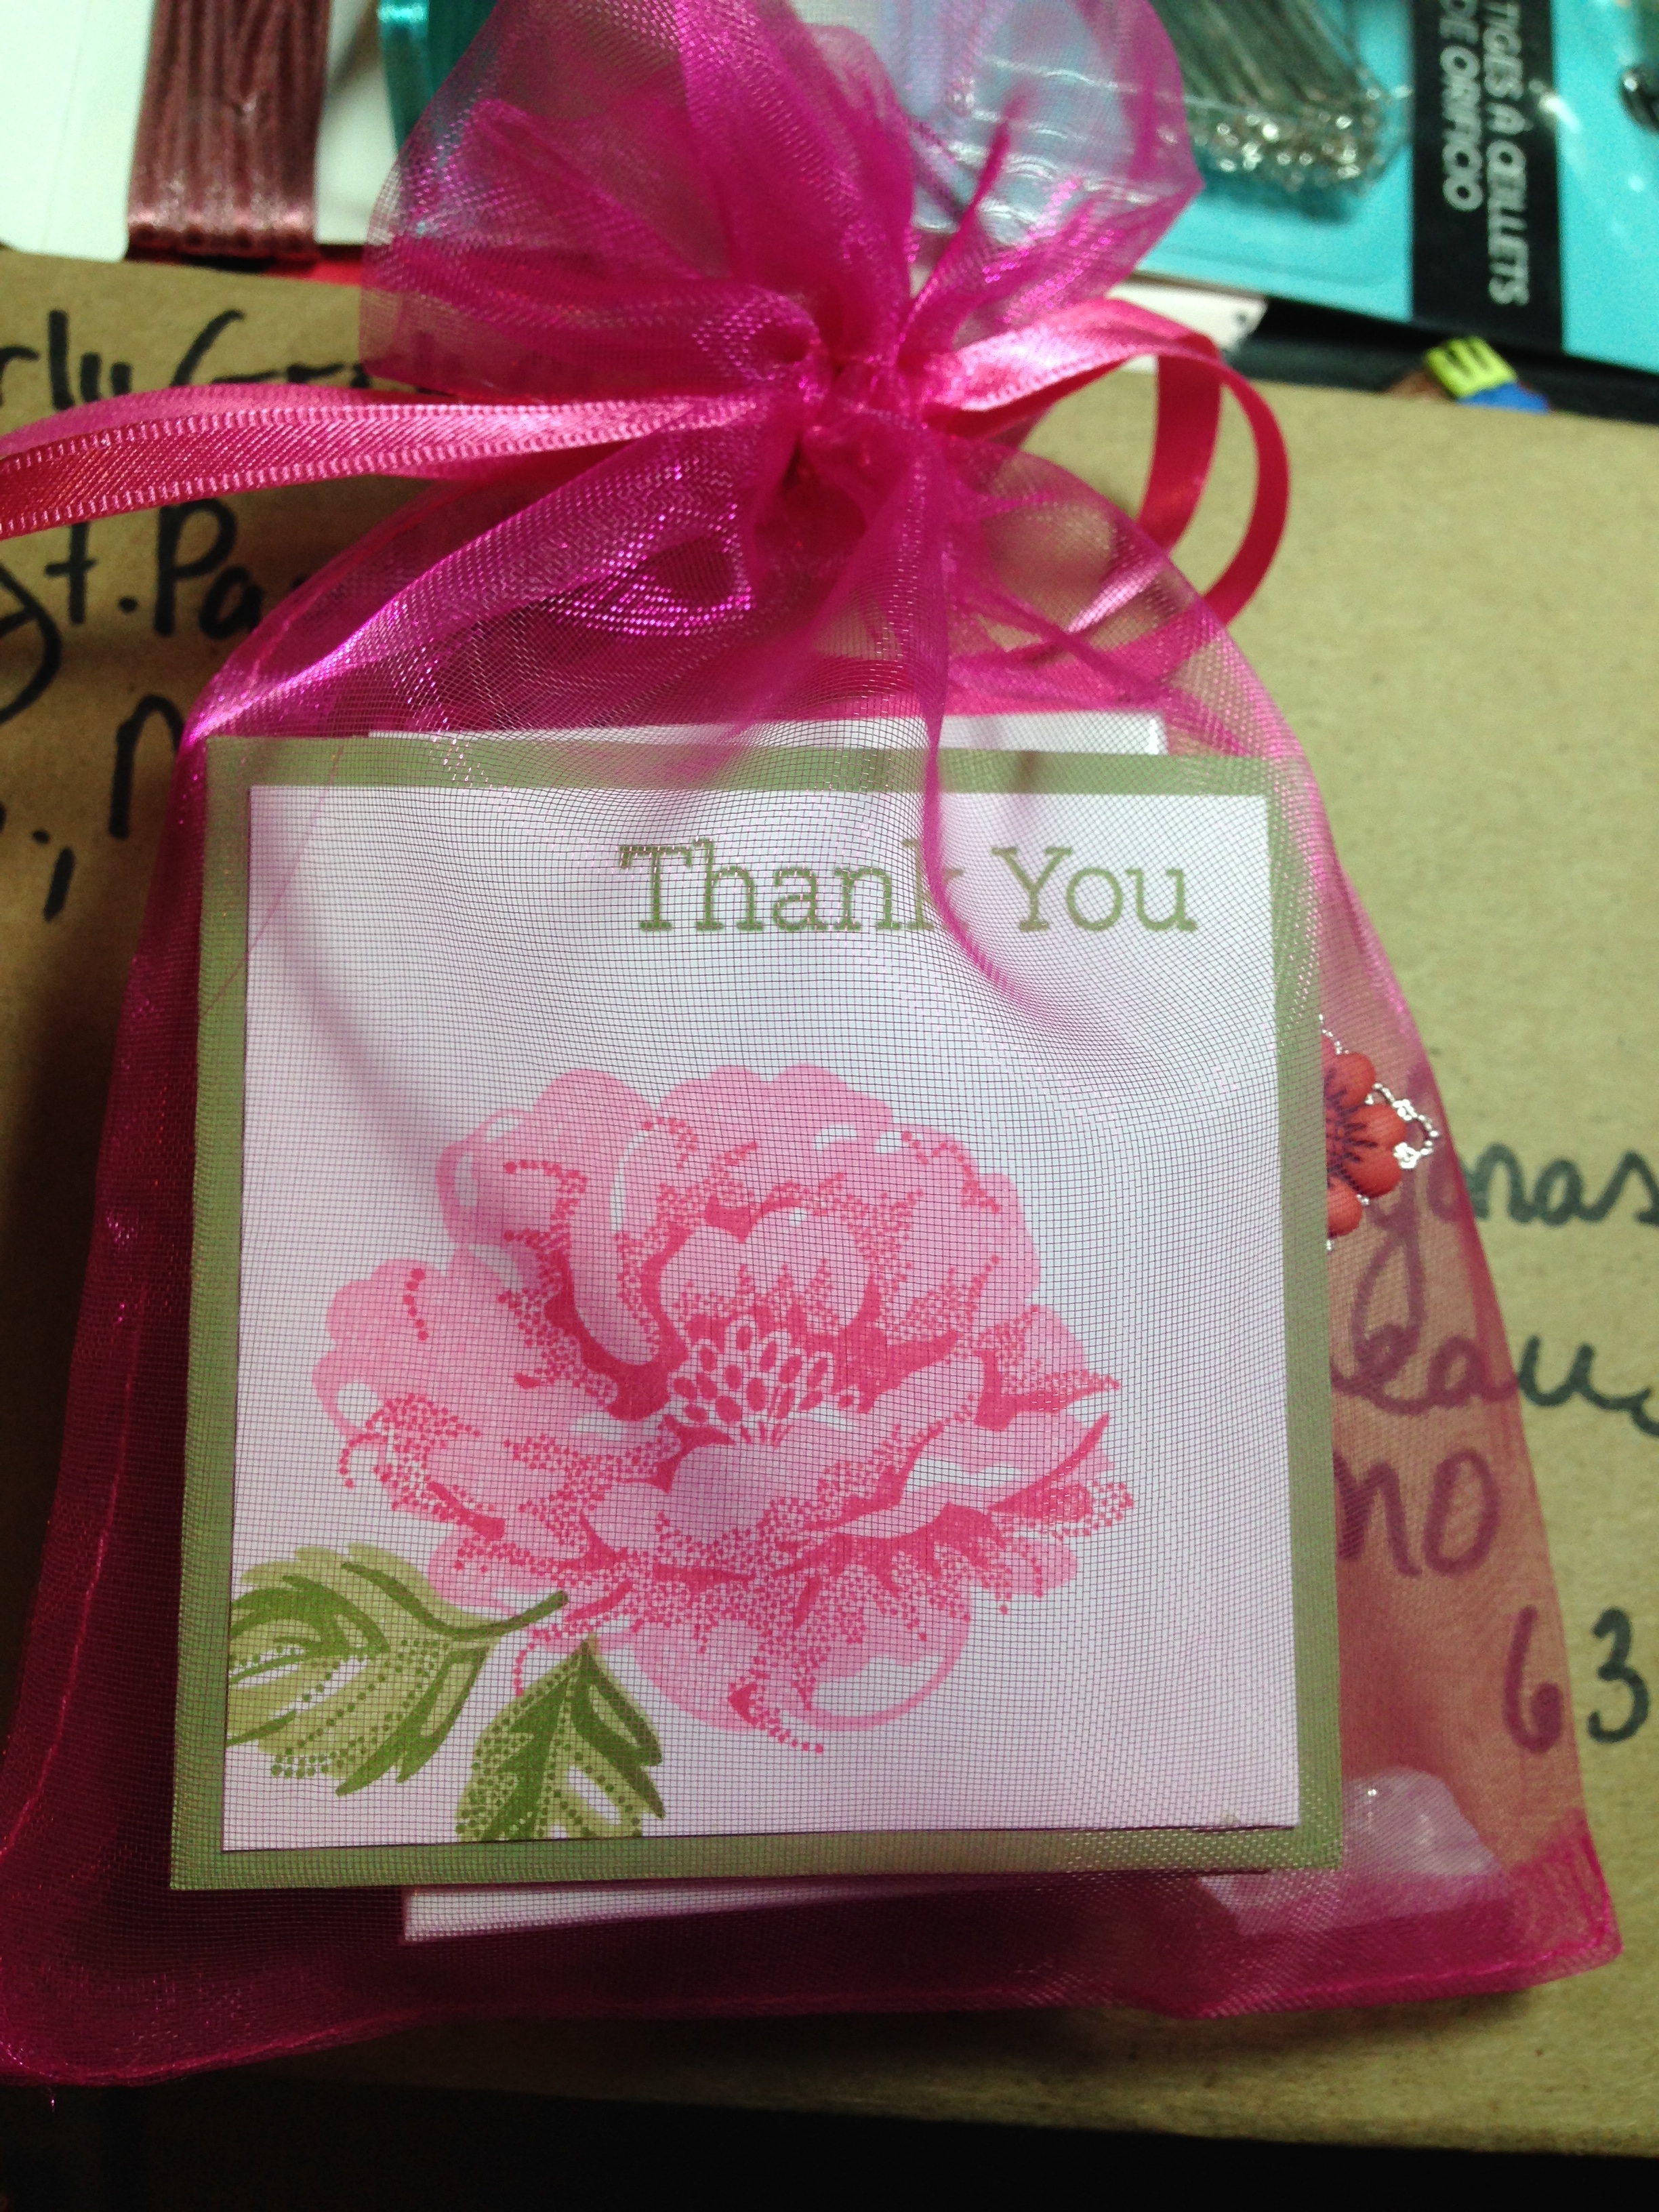
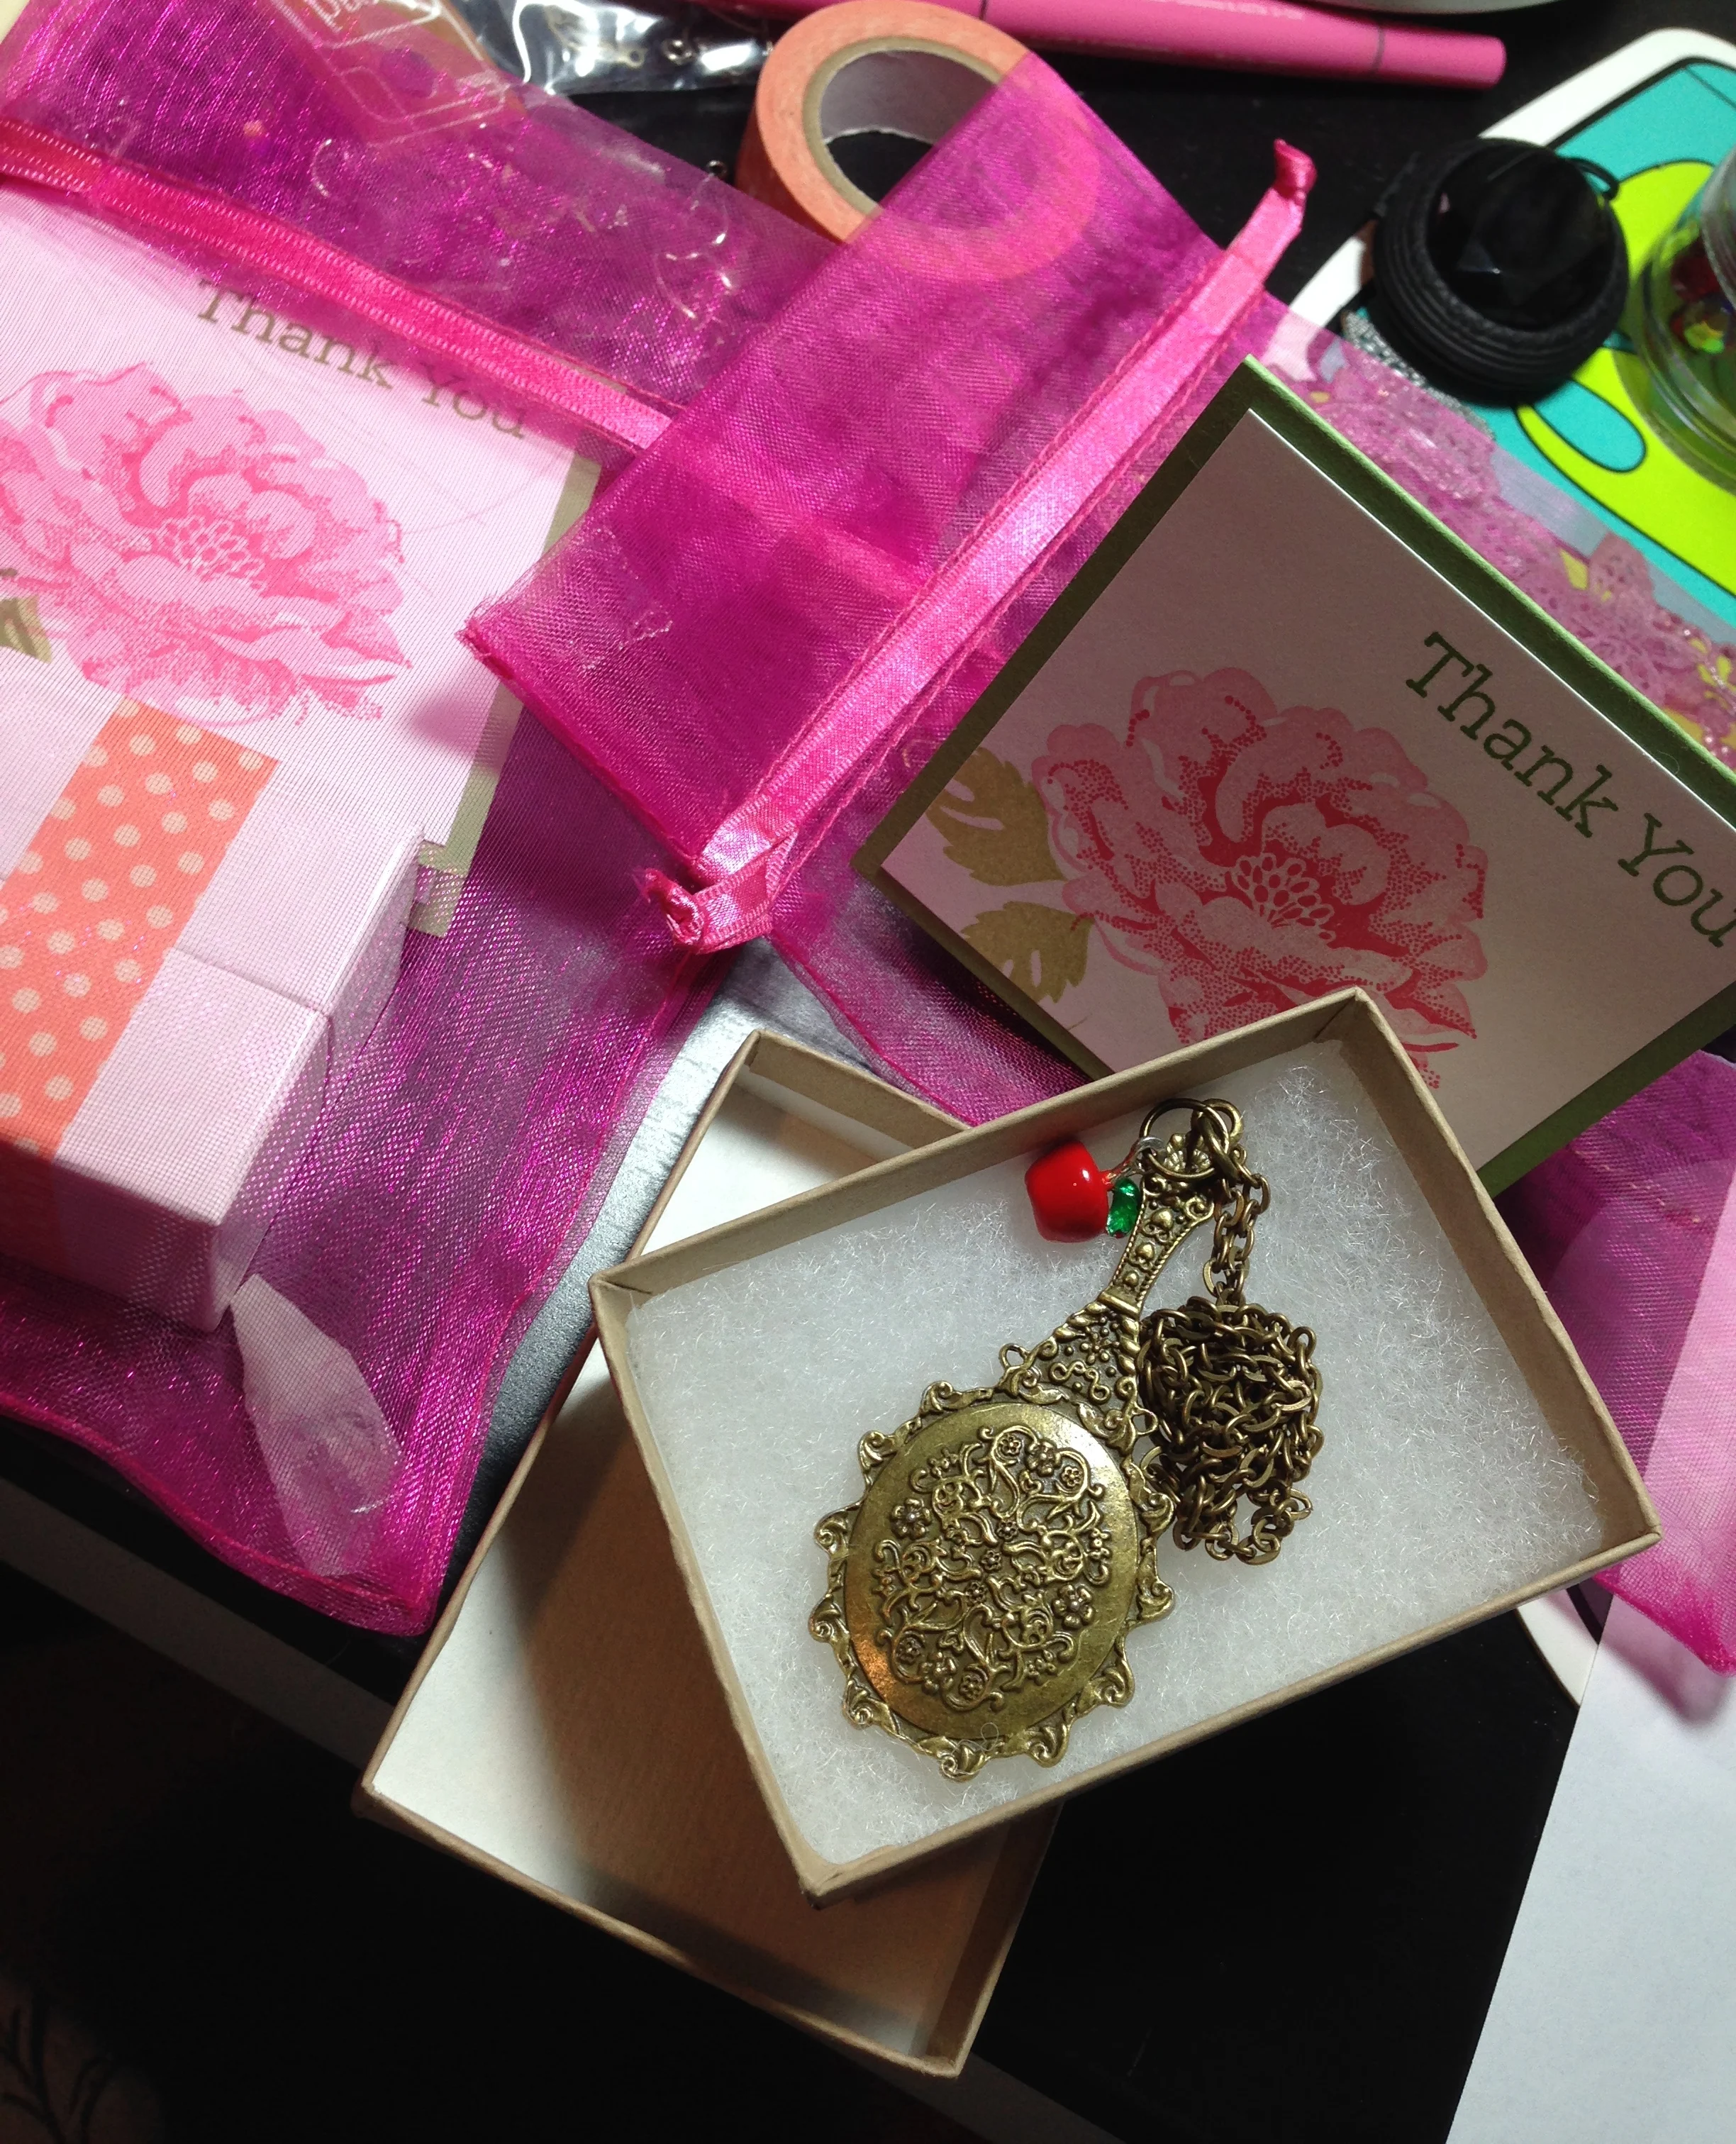
Girly Geek Chics
A new member of the Girly Geek Chics, lockets and cute Thank You cards!
Have a great day!


Snap Shots
Bits and Pieces of my shop's holiday!


GirlyGeekChic 2nd Annual Open House
I did not get accepted to a craft show that I applied to be in this year and was pretty discouraged. But with some help of one very supportive helper elf, I hosted a 2nd Open House this past weekend and I am so glad I did. It went even better than last year and I feel so happy and grateful for the support of my little shop, GirlyGeekChic. Here are some photos from my 3 day event. Have a great week!


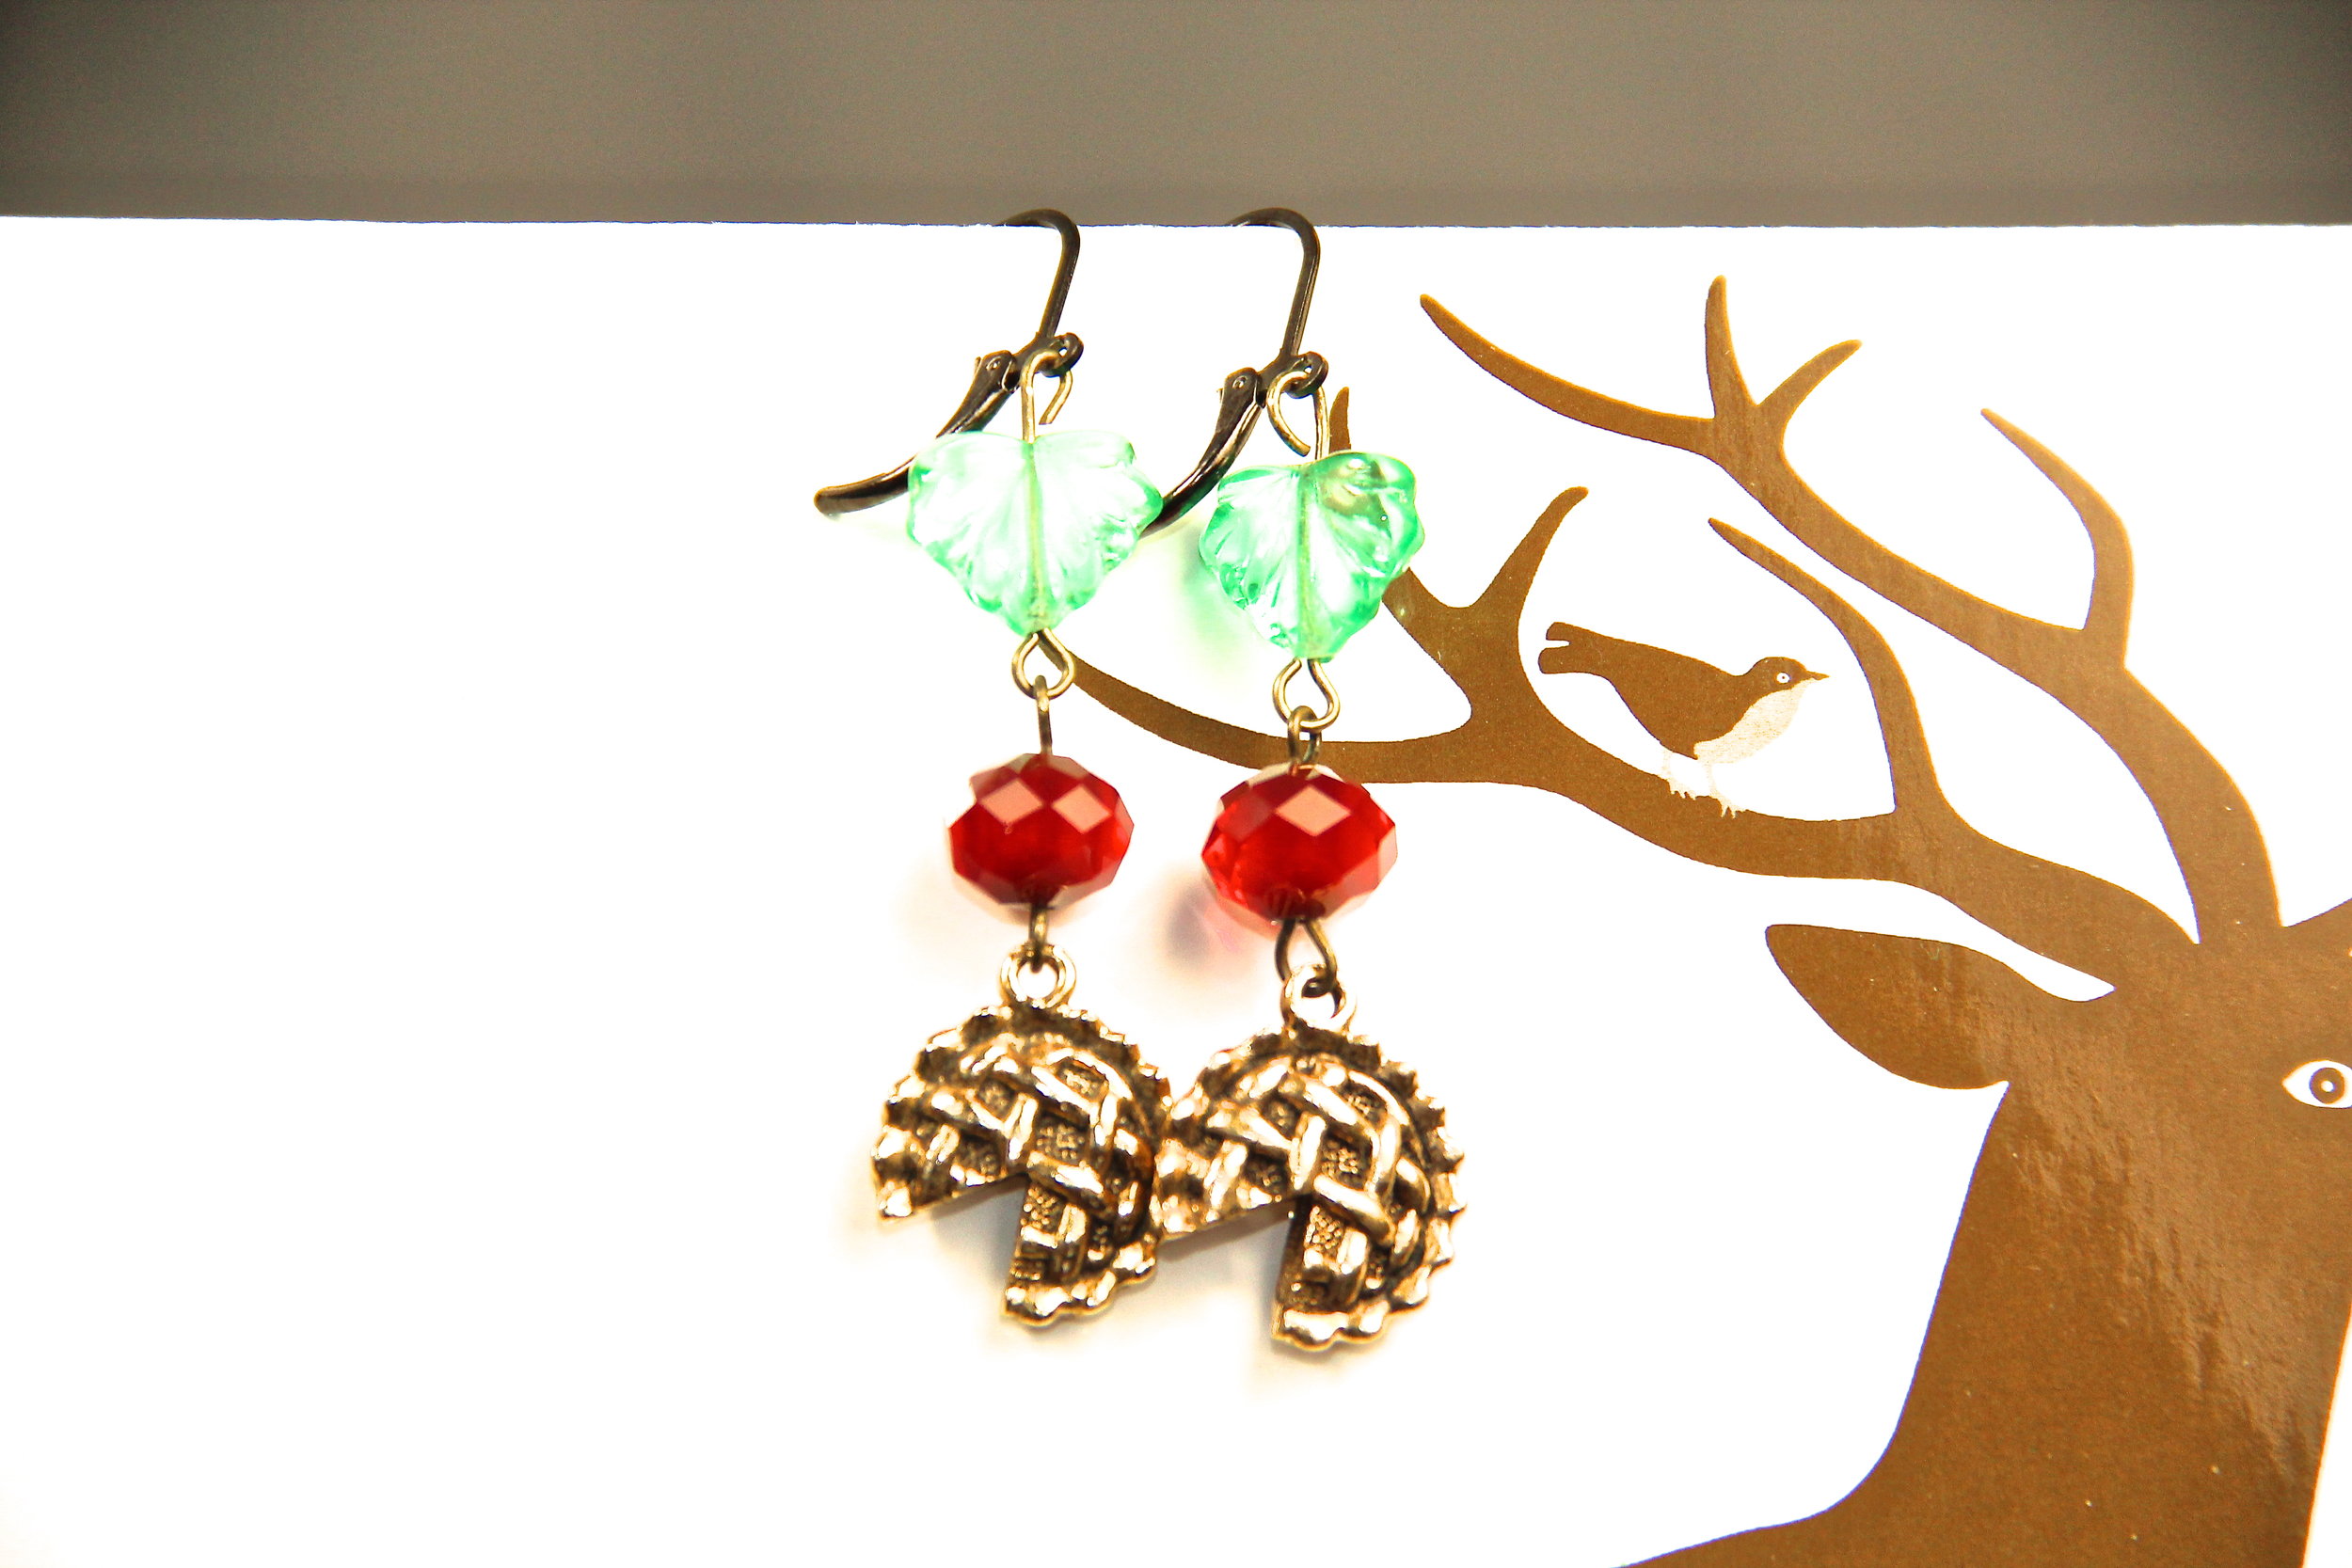
New Geek Girl Pieces!
There are more new things in my shop! I am so excited for the holidays and my Open House!


Pretties for the Holidays


Busy as a Bee
A sneak peek at some new things going up in my shop very soon.


These will be listed in my shop in the next week with many more pretties. I'd love it if you stopped by!
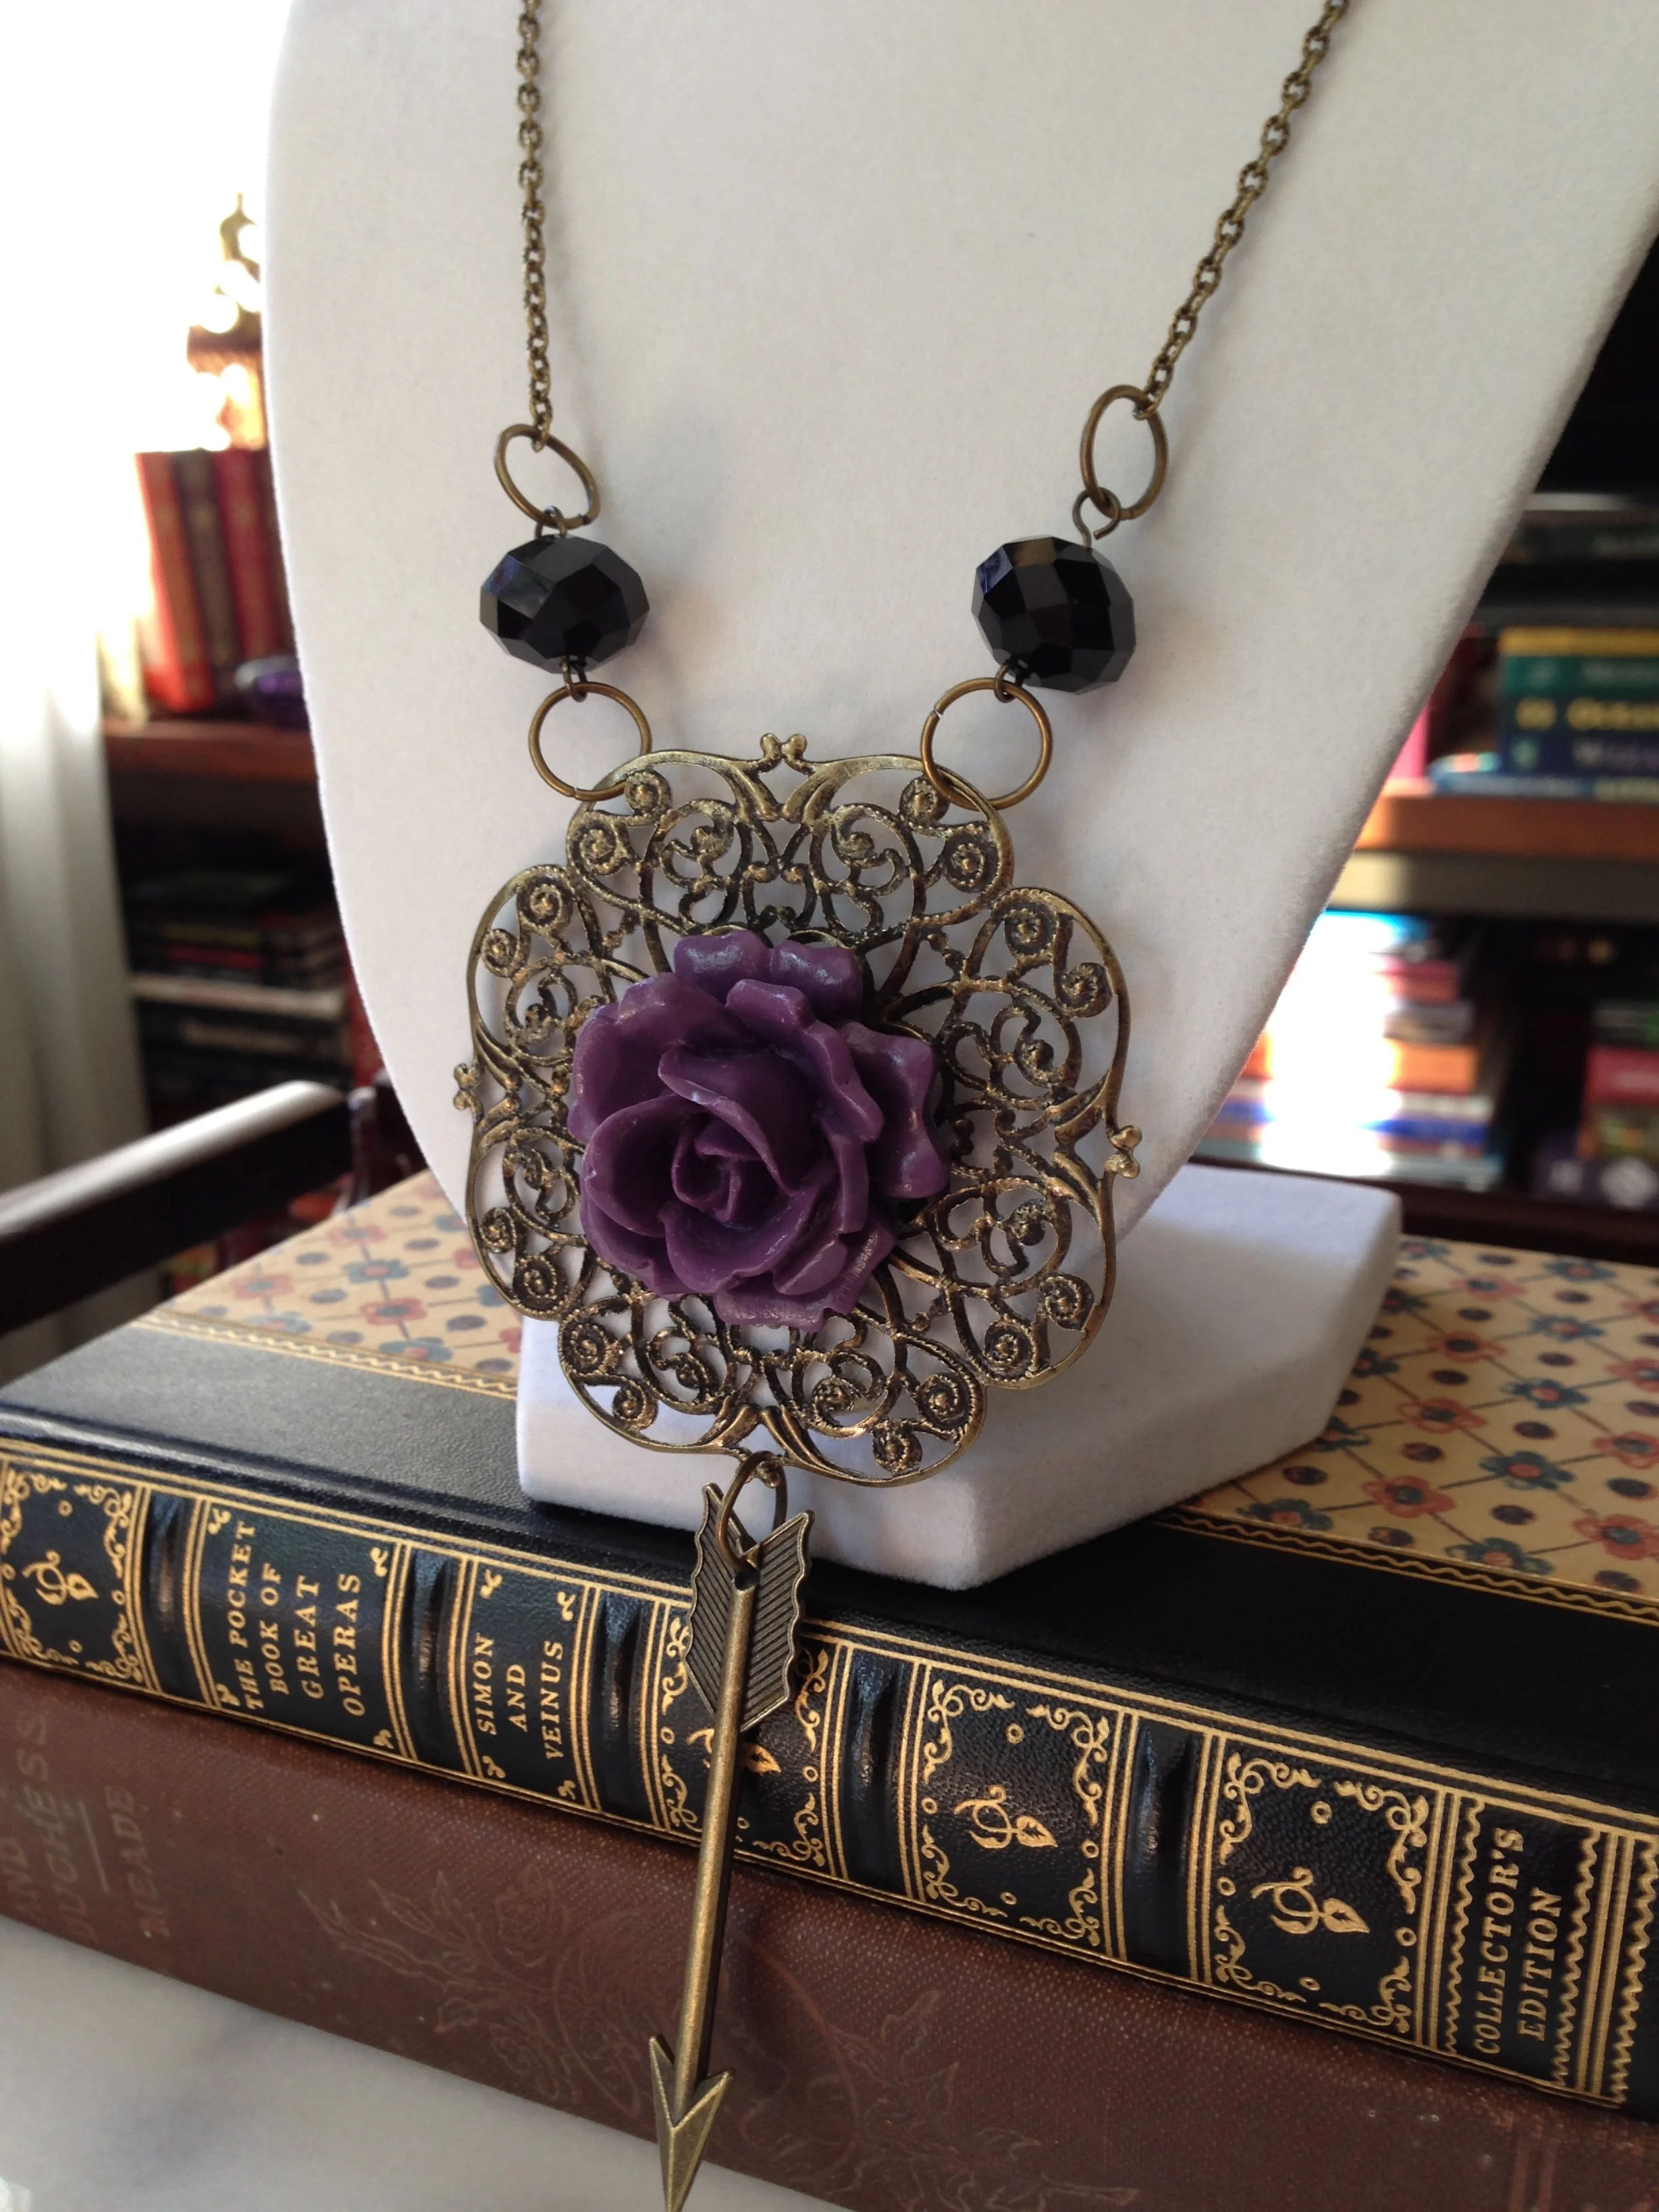
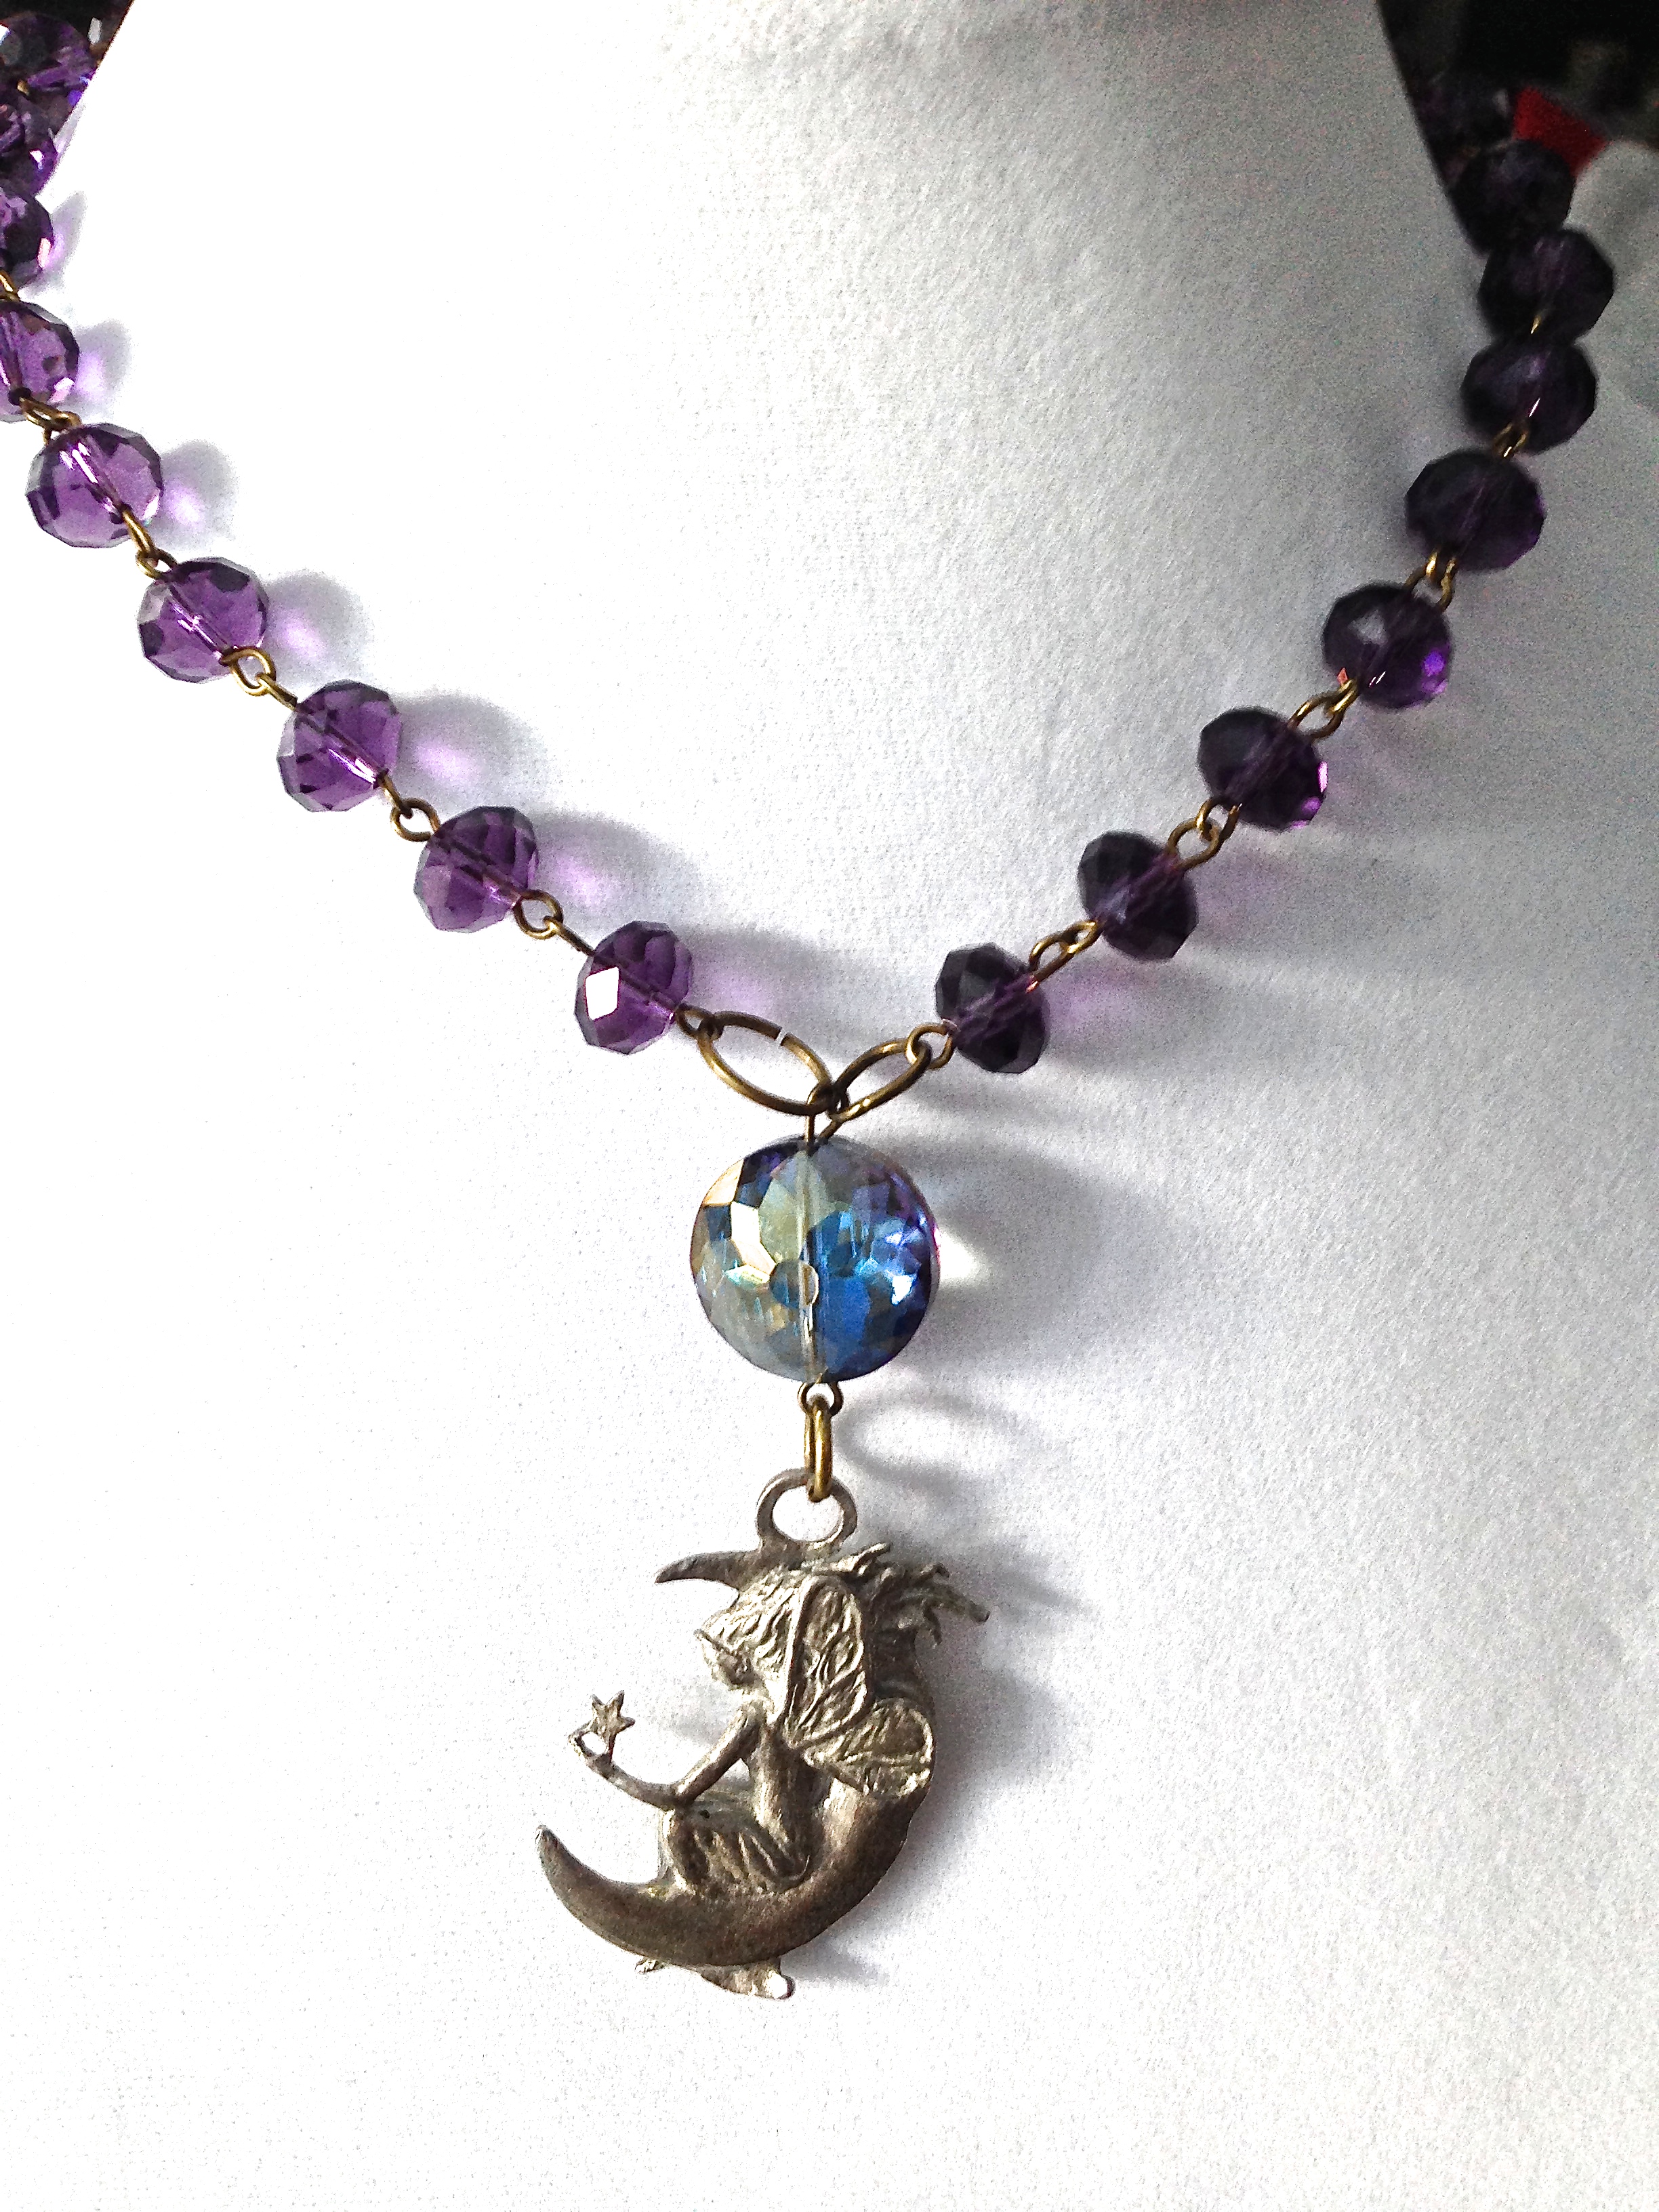
Fairy Tales and Fables
Things I have made...I am very influenced by fairy tales, myth, fables...the lessons hidden in dangerous beauty...


More New Things
I'm in the process of adding 40 new pieces to my shop. I'd love it if you stopped by!


New Things
I have been crafting like mad and I am starting to list the many new pieces I've created in my shop. I'd love it if you had a moment to stop by.


Things I've Made.
Listing new pieces, going through photos of past pieces, I love making jewelry.


Girly Geek Chic Shop Update!
It's been a while since I let you know that I had new things up in my shop! It was a busy month in May. Sold things off line, made my official 200th sale in my ETSY shop and worked on editing my book. I have made bunches more things and I'm slowly listing them. I'm on a big deadline with my book and launch party so my shop is not at the front of my list right now. It will be more after the book is out in July. Thanks for stopping by!


~~You can find some of these things and many others at GirlyGeekChic~~
Carousel Jewelry Holder: A How-To Post
I meant to put this up a couple of months ago but did not for some reason. I put up my Ferris Wheel Jewelry Holder How-To. Well this goes along with that post and it is also an easy alteration. I made this to go on my dresser to display part of my somewhat big handmade jewelry collection.
You'll start with buying the cupcake holder on Amazon. Once you get it-put it together per the instructions.
Other things you need:
-glue
-felt
-marker
-empty cereal box
-something to measure your circles( I used a roll of tape)
-scissors

Step 1: Put the cupcake holder together
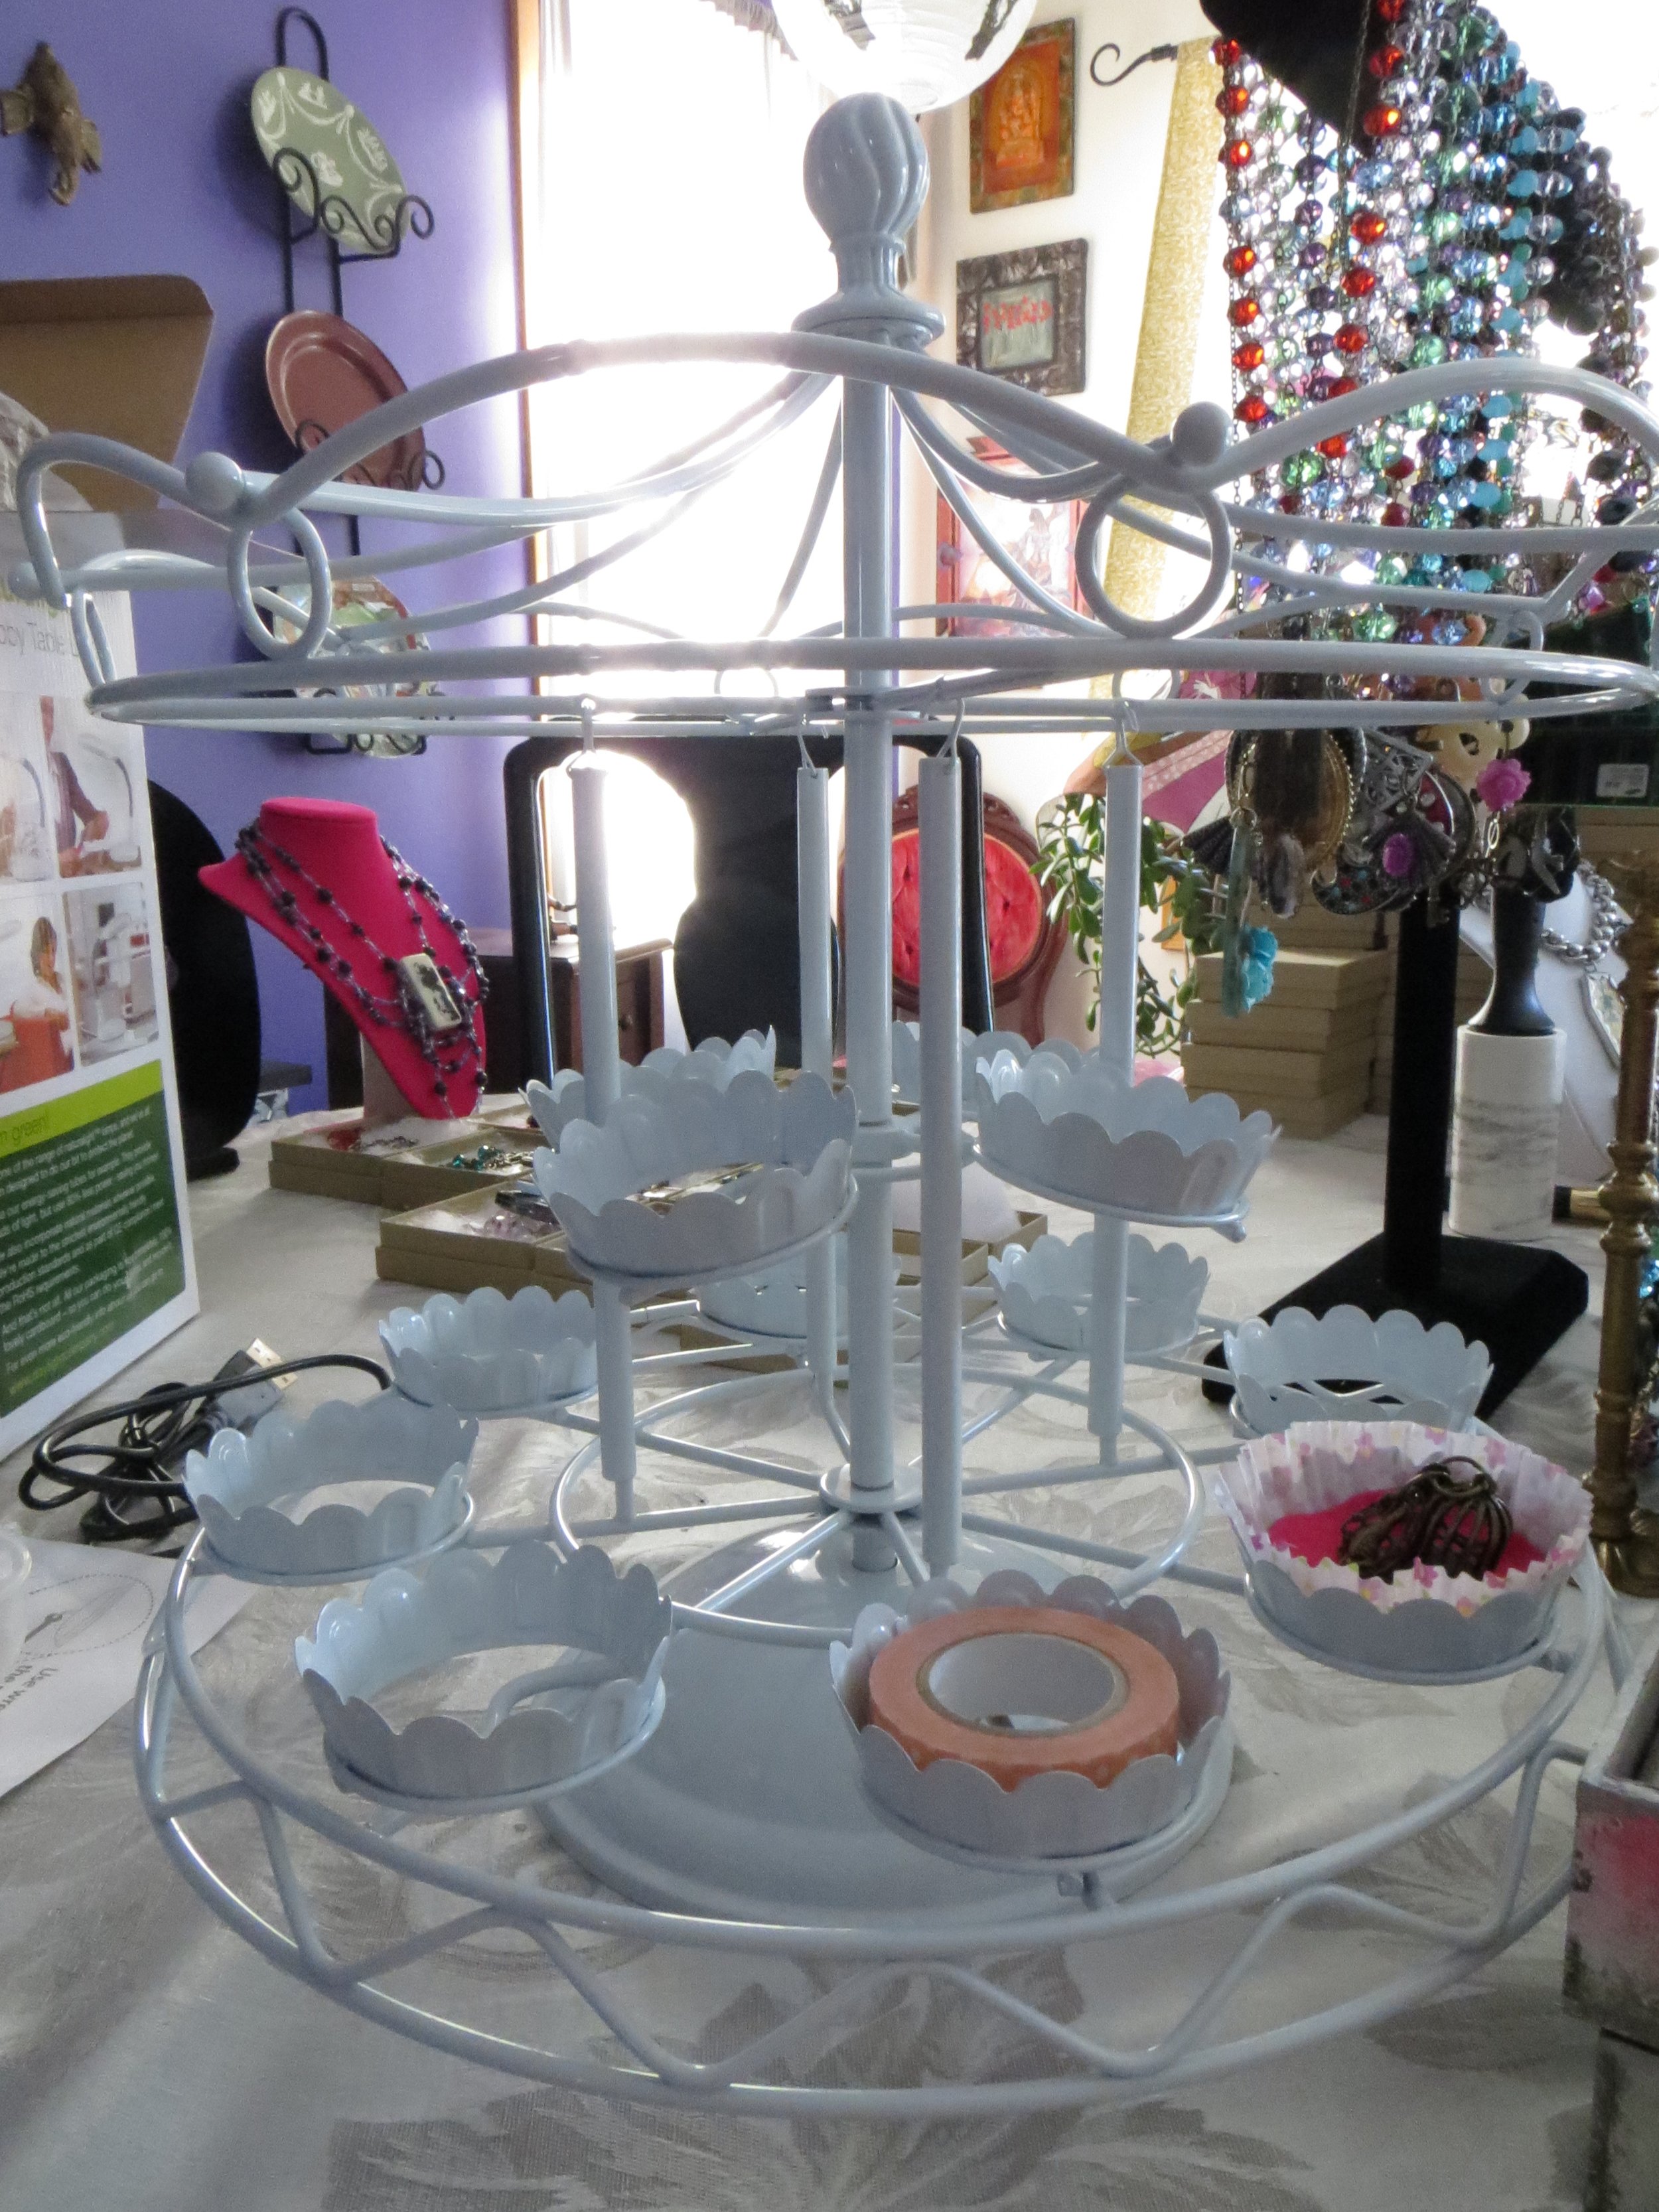
As you can see from the picture, after I put it together I was measuring the holder trays to figure out what I could use to measure what material I was deciding to use. I started with cupcake liners. Too flimsy. I tried paper and plain material. Fell through the bottom. Then I thought of felt. I realized I needed something to make it more sturdy but not too thick. And that's where the cereal box comes in:

Step 2: Draw circles with whatever size you decide to make your pieces.

Step 3: Draw the circles on the felt too.

Step 4: Cut them out. Cardboard and felt. This is pretty hard for me. I am terrible at cutting circles. But I trimmed them down and got pretty close.

Step 5: Glue them together.

Step 6: Love yourself. (I wrote myself notes on the bottom when they were dry)

Step 7: Put your circles into the trays.


Step 8: Fill with Pretties


A few months later and I still love my little set-up!
Girly Geek Chics
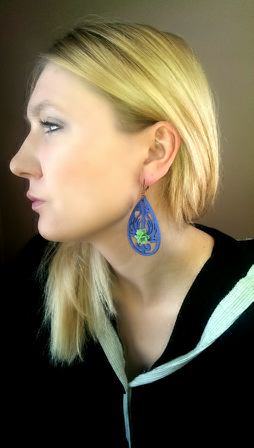
A few more customer photos of pieces I made ! Love getting pictures of them!


Girly Geek Chics
The first time I knew of someone writing about something I made was very exciting. Here is a link to the lovely Hannah's blog musing about the earrings she bought from me. I've recently been collecting photos from friends who have purchased things from me and I love seeing my pieces on them. Have a peek at these beautiful ladies. (Some photos by me, others taken by customers)


My First How To Post: Ferris Wheel Jewelry holder
So this is my first post about doing a little craft. It’s not very complicated and I thought it would make a cute project. This all came about as I’ve been remodeling my bedroom over the last 3 months. I wanted a new way to store and display jewelry. I have a lot of jewelry. I have been collecting handmade pieces for a very long time now. Additionally I make a lot of things for myself and I am lucky enough to have friends to make things for me as well. I searched and searched for display pieces but nothing was really striking my fancy. There’s plenty of pretty things out there they just were not what I was looking for. I came across some circus themed boxes on ETSY and loved the idea of a carnival. I adore the book The Night Circus and well, pretty much anything to do with magic, magicians and carnivals. Which got me started looking for carnival themed display pieces for my jewelry and there are pretty well none. What I did keep coming across was carnival themed party items and more importantly cupcake holders. They are tremendously cute for cupcakes but I don’t have cupcakes on display every day in my house although that would be quite spectacular. I started to consider if I could somehow make these work for my display pieces. I decided to order a couple from AMAZON. A carousel and ferris wheel, respectively. When they arrived I altered them a bit and I am in love with the results. Here is the alterations I did for the Ferris Wheel cupcake holder to turn it into a jewelry holder. I will post the carousel next week.
Things you will need:
-pliers
-Ferris Wheel
-paper flowers -these can be found at most craft stores often in the wedding decor section
Optional: you can paint these no doubt, I wanted mine black and white to stick with a Dark Carnival/Night Circus theme and to go with a painting a friend made for me but you can do yours whatever colors match your room/display

This is how it comes and what it's supposed to look like.

Out of the box with all it's baskets attached. Also, see all the things I make in the background mess? This is why I need organization.

The paper roses I used to decorate the ferris wheel. The "stems" are made with very malleable wire so it is very easy to wrap these any way and anywhere you want. I got mine at Micheal's Arts & Crafts store.

I used my pliers to remove most of the baskets. I left two on for counter balance and to put bracelets in. You could remove as many or as few as you want I would think.
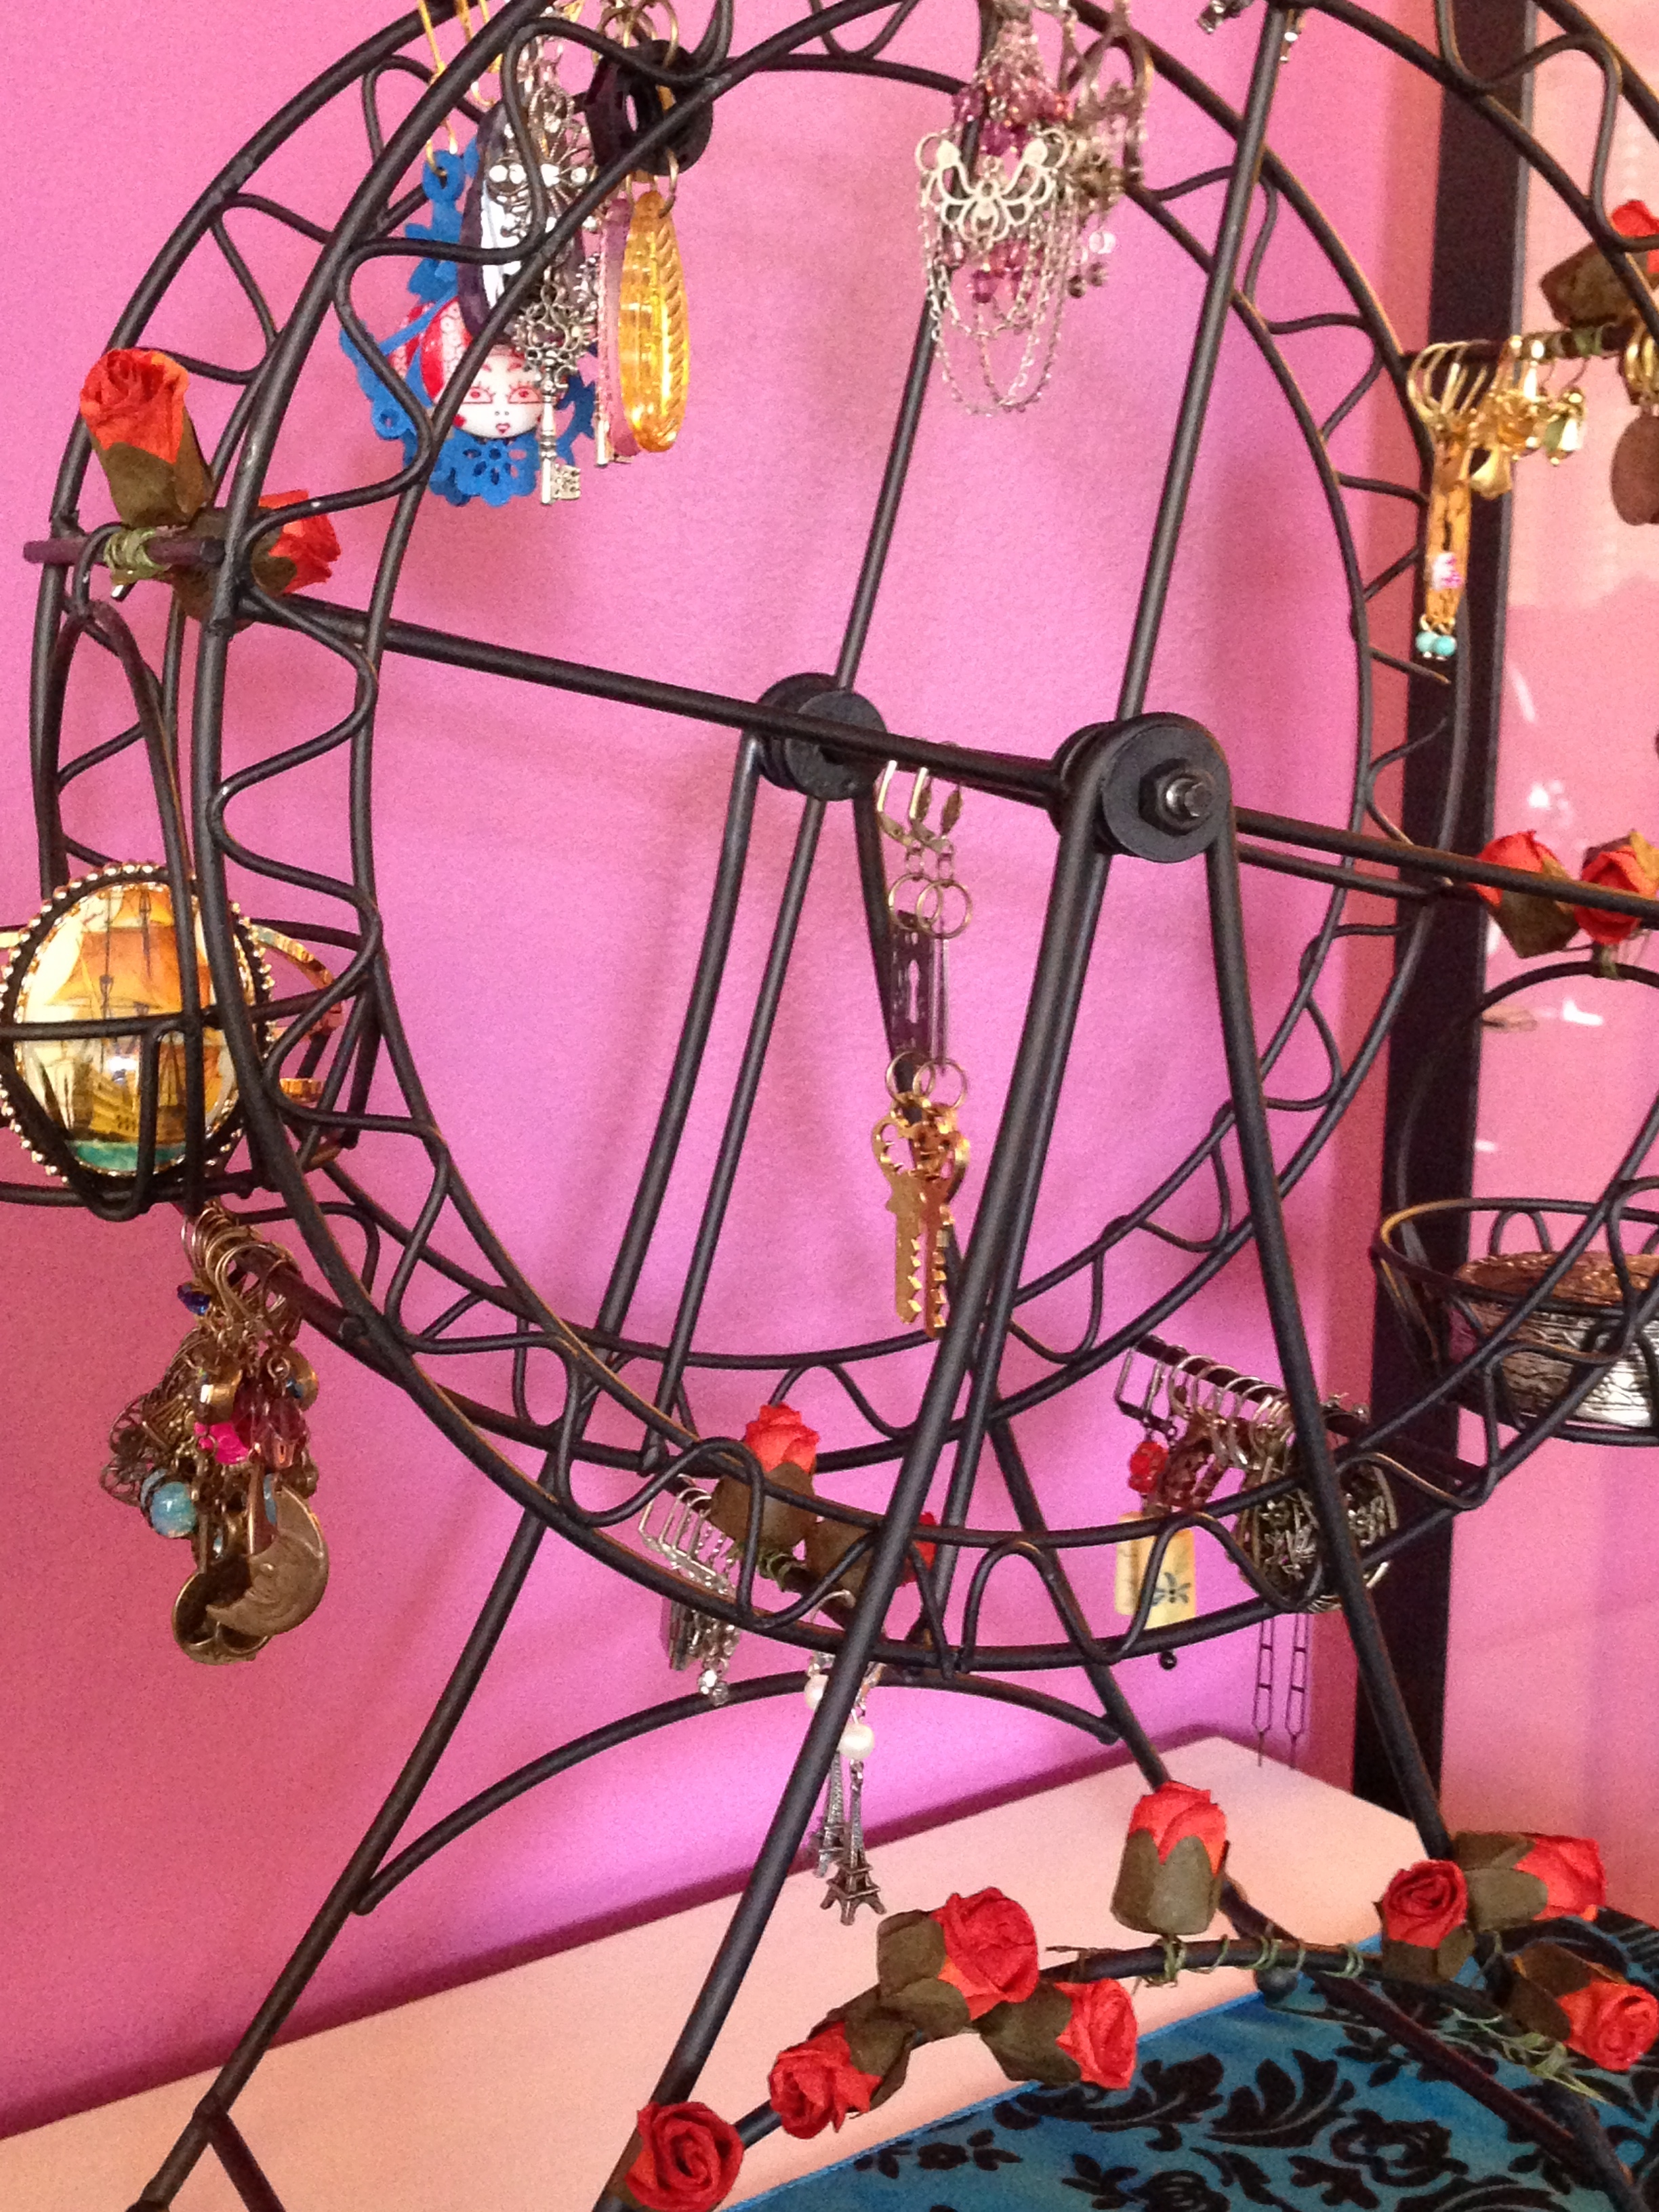
Add flowers where you like and earrings. Easy peasy.


And thus I began to build my own carnival.